12/16/2014

Japanese sake brewing project (7) ~ The second batch

Different type of KOJI

The first batch is now aging stage, I probably need to rack it some time a few weeks from now.   It has not been clear yet.   In a mean while, I started the second batch with some adjustments.

Here is some points of the adjustments:
  1. Different type of KOJI
  2. Reduce the amount of KOJI
  3. Reduce water
The first batch, a freeze-dry type KOJI was used.    There is another type of KOJI in a local Japanese grocery store.   It is still a "dry" KOJI, but the one in the photo above has more moisture.   Also, the amount of KOJI for the previous experiments could be too much.  It may impact to the color and flavor.   The second batch used only a little more than half of the previous batch.

Then the last one is the amount of water.  I reduced around 20%.

The starter process started last night and I observed bubbles from the air lock.   It seems to be much slower fermentation than the previous batches.

(To be continue)

12/13/2014

Japanese sake brewing project (6) ~ Pressing / Pasteurization

Pasteurization -- deactivate fermentation and kill unexpected bacteria and etc.

Pressing

After the last addition (the third addition), the fermentation was active for more than 2 weeks.   A timing the fermentation to be stopped is one of key decision for brewing sake.   Many article on the internet mentioned, it would be around 2~4 weeks from the last addition.

In my first brewing, I decided to stop the fermentation after 17 days.

Pressing method

In my test brewing before this batch, it is very hard to press just using a close.  Therefore, I thought using a metal mesh would be a good idea to separate / extract the liquid part and sediment.  My fermentation tank has  "a down spout".   When I brew beer, using it to take beer out from the tank.  The contents will be separated with 3 layers after a several days of the fermentation.   The middle part is the liquid part and it is probably easy to extract the liquid part from the down spout.

Actually, it was a good idea.   The middle part is really liquid and not much sediment included.  Then we can minimize the pressing effort.   I extracted the middle layer from the spout and total amount of the liquid part is about 1.5 gallon.   Then the left over is pressed with a metal mesh.   However, the sediment is soft and if we press the sediment, then the sediment passed through the mesh.   With this process, I got about extra 1 gallon of liquid with a lot of sediment, it is called "Nigori" in Japanese.

Pasteurization

After pressing process, I did pasteurization that deactivates the fermentation and kill unexpected bacteria and etc. to store in the room temperature.   The process is put a jar that has the liquid part into a larger jar to heat up.   I put a thermometer to monitor the liquid temperature.   Based on the information on the internet, the temperature needs to be up to 60C+ (140F+).   Then chilling the liquid immediately.   After that, it will put in jars to store.    It will take a few weeks to settle the sediment into the bottom.

Tasting

 I tasted it after the process.   The taste was not too bad.  Actually, it is much better than I expected.  I still needs to wait more time for aging the sake.   However, I started considering how I will proceed the next batch.

(To be continue)


11/28/2014

Japanese sake brewing project (5) ~ fermentation is in progress!

Surface of MOROMI in the 7th day from the 1st addition (1st building up)

Fermentation is in progress!

It's been about 2 weeks from the first day of the brewing process and the 9th day from the 1st addition (1st building up).   The fermentation is a bit slowing down now, but the bubble from the air lock is still going on in a short period.

Original plan was not to open the lid so often, I was thinking just shaking the tank.   However, there is a layer of rice on the surface and I think it is necessary to stir  a few times a day to get more uniform fermentation.   So that I need to be really careful and have a good sanitation every time to open the lid.

Taste?

Since I open the lid every day, I usually take a small amount of sample and taste it every day.   It is not to bad at all.  The rice is getting softer and taste is getting better day by day.

Next Step?

Probably another week to complete the fermentation and will separate liquid part.   Also, I started to considering how I will do the next batch.    Since the recipe and process is not really completely established and I think it might be better to try more batches other than a large amount.   Therefore, I will try to optimize the amount to fit 2 gallon fermentation tank instead of 5 gallon tank. 

(To be continue)


11/23/2014

Japanese sake brewing project (4) ~ NAKAZOE / TOMEZOE (Second / Third addtion)

Before NAKAZOE (Second addition)

NAKAZOE / TOMEZOE (Second / Third addition)

 As I mentioned in the previous posts, a traditional way to brew Japanese SAKE is typically use 3-steps addition.   The first addition is called HATSUZOE, the next one after 2 days of the first addition is called NAKAZOE and the last addition is called TOMEZOE, that is typically the next day of NAKAZOE.   However, I was out of town after NAKAZOE and I could not do TOMOZOE the next day.   So I did it two days after NAKAZOE.

Fermentation is active after the first addition, adding more to keep active fermentation and smelling is getting better.

 Right before the third addition (the last addition), I got a little sample from the tank and filtered with a coffee dripping system.  Since we are addition more materials after the first addition, the alcohol level was getting lower temporally, however, the smell and taste is much better than I was expected.

Early tasting right before TOMEZOE (Third addition)

It is still not really clear, but the taste is already Japanese SAKE.

I think everything is going well at this moment and keep monitoring the fermentation status at lease once a day.

(To be continue)


11/20/2014

Japanese sake brewing project (3) ~ The first addition (HATSUZOE)

Changed to a larger fermentation bucket (5 gallon)

The first addition (HATSUZOE in Japanese)

On fourth day, the fermentation activity was slowing down.   Bubbles in the air lock was not frequent as the previous days.   It seems that there was not much sugar left in the starter cultures.   According to many articles on the internet, it may take a few weeks.   However, the sample amount of this trial is not much and there might be enough cells in the original yeast pack.   I guess that might be a reason to slow down the fermentation activity.   It seems that the fermentation of the starter has completed.

The smell was also getting more yeast flavor and I think it might be a sign to tell there are a lot of yeasts in the cultures.

Once the starter (SHUBO) is getting ready, the next step is the first addition (HATSUZOE) that means to start actual fermentation process for SAKE.

Need larger fermentation bucket

Based on observation last a few days, the height of the form on the surface of the starter solution reached to the lid of the small fermentation bucket (2 gallon).   It might be a chance to overflow if I add more into the small tank.  To be safe, I decided to use a larger bucket (5 gallon) for beer.

The first addition

 The material is pretty much the same as what we put into the starter (SHUBO) except the yeast.
This time, I added the followings:
  •  Rice (3 Japanese cups, that is 540ml volume) 
  • Water (1000ml, bottled water or need to boil)
  • Dry KOJI (200g / 0.44 lib)
Rice needs to be cooked as "hard mode" with a bit less water.  The water level on my rice cooker is a level of 2 cups of sticky rice.   The cooked rice should not be soft.  The process is a similar as what the starter process does.
Cooling down the cooked rice and mix it with cold water.  Once the temperature becomes below 30 degrees C (86 degrees F), then mix with the dry KOJI.

 Dry KOJI, it may be found in a Japanese grocery store

 Then put the mixed material into the starter.   The next day of the first addition, it will be a process called "ODORI in Japaese" and just wait for one day without adding next material.

The fermentation was getting back to active after a few hours.   The smell is also getting fruity.

(To be continue) 


11/16/2014

Japanese sake brawing project (2) ~ Started making a starter (SHUBO)

Started making a starter (SHUBO)

The first batch is started!

All materials are ready and I started the first batch of Japanese SAKE based on a traditional process modified for a home brewer.  The first state is making a starter, which is traditionally called SHUBO in Japanese.

The starter consists of some steam rice, some malted rice (KOJI), some water, the yeast, a little citric acid and a little epsom salt.  The followings is ingridents:
  •  Steamed rice -- to simplify the process, 2 cups of rice is cooked in rice cooker instead of steaming with a bit less water than a regular cooking.
  • Dry KOJI -- 135g
  • Bottled water -- 700ml
  • Citric Acid -- 1 Tea spoon
  • Epsom salt -- a little
  •  Sake Yeast -- Wyeast 4134 SAKE #9
A traditional way, the rice should be steamed.  However steaming rice is not really easy process and I am looking for a simple and easy way.   Therefore, I decided to use a rice cooker instead.   To cook the rice, using 360ml of rice with water level 2 cups of OKOWA with a bit hard finish.
Once the cooking has completed, we need to wait for cooling down.  After that adding bottled cold water and mixing with the cooked rice.   Once the temperature is lower than 30 degrees C, adding KOJI and yeast.   Citric Acid is used to minimize the infection with acid (pH 3.6~3.8).  This process is based on "SOKUJO-MOTO" process.  In the traditional process, lactic acid is typically used.  But it is not very common, so that I used citric acid instead.   It is used for wine brewing and you may find it in brewing supply shop in your area.

Dry KOJI can be found in a Japanese grocery store such as Mitsuwa, Nijiya and Marukai in the San Francisco Bay area.   You can also find it on-line.

Fermentator 

 I got a smaller bucket from on-line.  One for beer I am using is for 5 gallon of beer.   It could be too big for Japanese SAKE and I got 2 gallon bucket from online with air-lock.

As the photo on the top of this article, it started.   According to a typical process, it may take a several days to move to the next steps that is adding additional rice/KOJI and water.


(To be continue)


11/14/2014

Japaese sake brewing project (1) ~ Intoroduction

Nigori-Sake (before filter)

Brewing Beer

This summer, I started brewing beer at home.   So far I have done 6 batches, each batch is around 5 gallon of beer.   I tried Golden Ale, Pale Ale, IPA and Summer Pal Ale.  Some of them are twice.  Each batch takes about 4~6 weeks to be ready to drink.  Overall, the taste and smell (aroma) are very good and I stopped buying a commercial beer after that.
Once I understand the process, it is not so difficult and pretty easy to brew beer.   The first day, I need to spend a half day to finish the initial process, but after that it is easy and not taking a lot of time.  This is a good thing of this year.

While I had a chance to drink a home brewed Japanese SAKE in a party.   It was not too bad, actually it is very good.   So that I am also interested in brewing Japanese SAKE.   During summer / autumn, it had been hot and beer is better than SAKE for a while.   However, once it is getting chilly, Japnese SAKE would be preferable drink.

Some experiments

Starting late October, it was getting chilly and I had a chance to do some experiments to brew a sort of SAKE, which is typically called as "DOBROKU" in Japan.  It looks like milk before filtering it to be a SAKE.   It is usually using a simplify version of Japnese SAKE brewing process.

Nowadays, if people search on the internet, they can  find a lot of information how to brew.  Although the brewing more than 1% alcohol by volume is illegal, there is a lot of information on the internet.  Based on the recipe on the internet, I have done experimental brewing twice.  The first time, I used a yeast for beer brewing and used a yeast for bread baking.   The both experiments were successful and they were not bad at all.   However, using beer yeast would be a better taste and smell.

With the experiments, I have a better idea for brewing SAKE and I am ready to go to the next step.  The next step is to try a bit larger batch something around 1 gallon of Japanese SAKE.

I have not established my own process of brewing Japanese SAKE yet.   This is a project to brew a good Japanese SAKE at home.  Based on my beer experiments, it could be better result with very careful execution for a small amount.   I am expecting something better than what we can get in the US with a reasonable price.

As a project, I will report the progress!  I will try to establish a reasonably simple process to brewing Japanese SAKE at home.   Let's see what will happen!

(To be continue) 


7/07/2014

Home Brewed Beer Project ~ complete the first steps

Boiling water with Malt

A few years ago, my neighbor gave us home brewed beer and it was very tasty.  I wanted to make beer some day.   However, I did not have a chance to do it.   Especially, we moved last summer and it was very busy and I did not have time at all.

This year, we settle in the current place and finally, I have a time to try own beer.

Got starting kit from a local store, HopTech

I got a starter kit from a local store in Dublin / CA, USA, HopTech. This is a shop the neighbor recommended to me to get the kit and ingredients.   It is very close to where I live.  However, I did not have any chance to stop by before.
During July 4th weekend, I decided to try this and I finally stopped by on the way back to home from a park.   There were many brewing equipments and ingredients.  Also, people in the shop is very friendly.   When I told them, this is my first time, then they explained what I need / how I can make beer.   I felt it was much better to get a starter kit from online shop like Amazon.

I got a starter kit and 30 qt boiling kettle.  I also asked an easy recipe and got "Golden Ale" ingredient kit, that includes "ready to use Malt", "hops", "dry yeast" and "priming sugar".

You may get them from on-line as well.   I think their quality is very good.

Preparation

 Last night, I read all instructions coming with the kit as well as the recipe.   Also, I did a "dry-run" with just a water to under stand how to transfer the contents one to the other during the process.

Getting started!

Then, I went through a whole process for fermenting beer.  It took about 6 hours including preparation and cleaning up after the process.   The kettle with water that is about 4 ~ 5 Gallons might be too heavy to use kitchen stove.  So that I used a camping stove in my back yard to boil the water and the malt.   I guess it might be a good idea.

The process was simple enough, just following the recipe instructions.   Boiling water, added malt, adding hops, then cooling down the liquid and settled.  The finally moved to the fermenting bucket with the yeast!

It was fun and I could not wait for it is ready to drink!!

Based on the instruction, the fermenting may take a few weeks.  Then, bottling and wait for another a week to get it ready!   I just checked the bucket and it seems to be good!

I have not drunk the first beer, but I started looking for the next batch!!  It is so fun and excited to make own beer at home.   The smell during the process is very very good!!!!


7/05/2014

Anthony Lake Chabot Regonal Park ~ much less water due to drought this year.....

Due to drought, the water level was externally low!!

Anthony Lake Chabot Regonal Park

Anthony Lake Chabot Reagonal Park is located near Castro Valley in Almeda county in California.  It is about 30~40 minutes from San Francisco International Airport.   This is called "Lake" in the park name, but it is actually a reservoir.

In the park, there are many trails around the reservoir, picnic area and camping grounds.   This week is a part of a long weekend, 4th of July weekend, in the US and it was very crowded today.

There is a parking lot after the toll gate.  However, many people parked on Lake Chabot Rd.   Since the street is almost full and I had to walk long way to get to the park.  I decided to park Nike Classroom Parking lot on a hill.  This parking lot is also free but we need to walk down a hill about 30 minutes.

No thing on the hill!

A last a few days, San Francisco bay area was hot more than 85F in daytime.  Even if it was early in the morning around 9am, the temperature is over 80F.   Around the parking lot, there is no shade and it was very hot and almost no wind.

 Near Nike Classroom parking lot, no shade!

 We walked down from Ten Hills Trail to Cameron Loop Trail toward the east end of the reservoir.  It takes about 30 minutes to reach a trail around the reservoir.  At the east end, there is a small bridge, but there is no water or water stream under the bridge.  It was dried out.

 Good thing was, once walked down from the top of the hill, there is a shade and there was wind on trails around the reservoir.   It was not too bad to hike in such hot day.   There were many people walk around.   On the other hand, there was no people except us on top of the hills.  It was obviously too hot to walk.    It might be better to park near the reservoir even if we need to pay some parking fee!!

We can walk to the islands
The right side of the islands is dried out!

Since it was really hot day, we decided to rent a row boat instead of walking around the like.  Walking around the lake is about 13~14 mils (about 20+km).  So we walked to the visitor center on the south west side of the park.
The rental fee is USD$20 / hour, $28 for 2 hours and $40 / day.  Not much different more than 2 hours.  So if people stay longer or do fishing, it is worth to pay some extra dollars.   We just rented for 2 hours and ate our lunch on the boat!!

Even if there is no shade on the lake, it was not too bad.   Duo to nice wind on the lake, it is nice to stay on the lake.


 Friendly ducks!

Ducks were very friendly and they came very close to our boat and kids were so happy many ducks around our boat.   I was with 2 kids, therefore, we did not have an options to rent kayak.  But renting kayaks would be another good option to enjoy the lake. 

Since we parked on top of a hill, we had to climb the hill after that..... It was too hot and we talked that we would park near the visitor center next time!

But it is a fun park near tri-valley in summer time!


6/29/2014

Villa Montalvo Arboretum County Park (Saratoga CA) ~ Short Hiking Trail in shades

Villa

Trail in a shade

This time of a year, most of trails on hills on the east side of San Francisco Bay are getting brown and almost no shade.   It is hard to enjoy hiking in summer time.  It might be too hot!!

Villa Montalvo Arboretum County Park is one of good trails in summer time in the bay area.  Most of trail in this park is under shades.


Nice trail under shades

I went hiking this park today.  Even it was very hot today, it was about over 85F in a town.  However, there was a nice wind and it was really nice hiking in the park.   There is a nice vista point in the end of a trail.   That is only part where does not have a shade.   The view is nice, we can see entire the bay area and hills on the east side of the bay.

Nice view from the vista point
The trails are short, there are some combinations of trails.  However, the total distance could be around a few miles and a few hours are good enough.   Many people on the trails are chatting and enjoy hiking.  

This is really easy hiking course in a spare time!!


6/16/2014

Hidden Beach / Aptos CA near Santa Cruz ~ A quiet beach!

Entrance to a trail toward a beach

No hiking this weekend!

Due to a rest day today, I did not go hiking as usual weekends while kids in a Japanese school.
The Japanese school in San Jose and it is just less than 1 hour away from Santa Cruz beach.  I drove to Santa Cruz with my wife this weekend.

After dropped kids, it was around 9am, we filled gas and went to Aptos where is close to Santa Cruz / Capitola.   My wife knows a quiet beach near Capitola.


The beach called "Hidden Beach".  We took Rio Del Mar Blvd exit on CA-1 and made left at Summer Ave.   We parked on the street and just took a walk to the beach.   There is a small parking lot at the trail head, just need to drive a litter far on Rio Del Mar and making right at Townsend Dr.  Then after residence area, you can drive to the parking lot.  However, the parking lot is small and we only saw one empty parking spot on the parking lot in the morning around 10am.

Wooden structure of a bridge for a real load

From Summer Ave, there is a rail load and going through under a bridge of a rail load.  The structure is made by wood.    Then we can reach the parking lot at the trail head.   From the trail head to the beach, it is only 5 minutes walking.  There is a residence area on the left and a small park.

A small park next to the trail head

After the park, you can see the beach.   In summer time, Capitola is usually busy in weekends, but this beach is less people can quiet.

Benches ~ you can sit and view ocean

 View from the benches

It was cloudy in the morning and getting better close to noon.  However to pick up the kids from the school, we need to leave around noon time.   There are some people on the beach.  I think the most of people on the beach were the local people, some of them were taking a walk and some of them were running on the beach.

In summer time, Capitola is usually busy and noisy during weekends.  So that it might be a good place just to enjoy the beach.   You might need to carry some stuff to the beach from your car.  However, you can have more private time on the beach.

It was cloudy, but not many people there


(I thought I published this last week, but it seems that I did not.  This was last week activity on June 7th, 2014)

5/26/2014

Fruits Picking in Brentwood / CA, USA

Peach is ready to pick!

This weekend is a long weekend.   However, our kids has Japanese school on Saturday.   We did not have any specific plan for the long weekend.   The weather was getting hot like summer, in daytime, it is about 100F last 2 days.

On Sunday, kids enjoyed in a community pool.  Then, we went to fruits picking in Brentwood (CA, USA).   Typically, it is a good time to pick cherry around the memorial day weekend.  However, it was the last day of the long weekend, most of cherry picking farm was closed or sold out when we were there.  So as strawberry.  

We drove around to find out a place to pick other fruits.   Finally we found a farm that had yellow peaches and enjoy to pick peaches.   It seems next a couple weeks will be good for peaches and other fruits.   It could be very hot in day time especially in the afternoon.  I would really recommend to be there early in the morning before getting hot.


5/18/2014

Plan to start a Recovery Training

Planter Fasciitis

I have "Planter fasciitis" on my left foot.  I got stress fracture on my left leg in late 2012 and I had to stop running for six months.  During the recovery training, I got Planter fasciitis.   It was not too bad some time late last year.  However it was getting worse and I had to stop running again at the end of last year.

I have still a little pain at the first step after getting up from a bed in the morning.  However, a doctor told me it could be OK to start running.

Plan

As I mentioned in a few posts before, I found some new training plan in Garmin Connect.   Since I was getting this problem in a recovery training from the stress structure.   Therefore, I would like to be conservative this time.  That is why I picked "Getting started Level I".

It seems that this plan would be easy for me.  But I want to slowly start running this time to avoid any other injury due to a training plan.

This plan is heart rate base training plan for beginner.

I hope it works for me well!

I will also report my progress in this blog as well.


5/11/2014

Alum Rock Park (San Jose / CA) ~ Nice trail in wild flowers

Nice trail in wild flowers

Alum Rock Park (San Jose / CA)

This weekend, I went hiking in Alum Rock Park in San Jose when I was waiting for kids in Japanese school.  The park is  located east San Jose.   From Berryessa Rd Exit on I680, the park is about 2.5 miles away.
There is a gate at the entrance of the park and people needs to pay USD$ 6 for a day use.  However, many people park on a street before the gate to save some money.   When I was there around 9:30am on last Saturday, there were many cars parked on the street.

Once getting into the park, there were many empty parking spots in the park.  It seems that there is no problem if people are willing to pay the fee.

I parked Rustic Lands Parking and started hiking from the parking lot.   There is a trail head post and it shows overall trails in the park.  However, the map was running out.  It is better to download a map from the web site of the park and print it just in case.

Hiking

This time I took North Rim Trail and Eagle Rock Trail to get a vista point.  From the vista point, we can see South part of Silicon valley.  Since this is short hiking, there were so many people on the vista point.  After that, I took Todd Quick Trail, then getting into Santa Clara Country Open Space Authority and took Boccardo Trail to get a top of a hill.

 Still many wild flowers were blooming

The trail is nice.  There were many wild flowers along the trail.   Since there are only low height grasses and we can see the southern part of Silicon Valley almost all the time.  Some part of trail is a bit steep, it seems that people who were riding mountain bike had a hard time to climb the hills.  Some people enjoy trail running.
We can see San Jose down town from the trails

There were many people hiked in the bottom part of trails.  However, once trail is getting steeper, I did not see many people any more and it was really quite and enjoy the nice view.  Since there is almost no shade on the trail, it might be too hot in summer time.   I guess it is the best season in spring.

Other Park activity

Since this is my first time to visit this park, after hiking, I took a walk in the park what else we can try in the park.   There are many picnic tables along a creek.  Also, there is a flat trail along the creek.  It might be very nice just short walk along the creek and enjoy picnic.
Some of picnic sites require to make a reservation to use.  However, there are also many tables just walk in to enjoy picnic.   Actually, there were many people along the creek other than the trails I walked.

It might be better to pay the fee if people try to enjoy picnic.   If people try hiking, I guess it might be better to park outside of the park.  It may need to walk extra a few miles, but people can save some money.

I think it is still good season to see wild flows in the park.  You may want to tray this park some time soon!


5/03/2014

Mission Peak / Fremont CA ~ A vista point to look over Silicon Valley

Silicon Valley!

Mission Peak (2520 FT/ 768m)

Mission Peak is in Fremont CA, a landmark of Silicon Valley.
The peak is located the east side of San Francisco Bay.  From the summit, we can see Silicon Valley and we might see San Francisco if the sky is clear.

There are some trails to reach the summit.  One of popular trail heads is located near I-680 Mission exit, the end of Stanford Avenue.  There is another trail head on the south side of Ohlone College.  The last one is Sunol Regional Park on the east side.

Today, I hiked from the Standford Avenue trail head.

Trail head

 Trail head is located the end of Stanford Avenue where is close to I680 Mission Blvd.  There are two mission exit on I680.  The one where is close to the trail head is one in the south.
There is a small parking at the trail head, however, the parking could be full in the most of weekends in a good season like spring.   Then people may need to park on a street in a residence area.   Stanford Avenue near the trail head is no parking.  Police officers could check periodically in high season, therefore it is not a good idea to park there.

It seems the trail is getting very popular and I could not find any good spot near the trail head in the residence area.  So that I had to walk extra half miles (about 1km) to get to the trail head today.   Other than very early in the morning, you might have a hard time to find out a parking spot.

There is one restroom in the trail head, however, it was crowded and people made a long line this morning around 9am.

Trails

From the trail head, there are two different trails.   One is a primary trail straight up to the summit and most of people take this trail.  However, it is usually crowded and noisy.  (Hidden Valley Trail) That is one of reason I usually take another trail that branches to right near the trail head.   This trail could be steeper than the main trail, however, there were not many people and quiet.  (Peak Meadow Trail) I like this trail better and I usually take this trail for hiking up and come back from the main trail.  The total loop is around 5 miles (8km).

Peak Meadow Trail

The both trails are wide fire truck lanes.   Except very small section near the main ridge, there is no shade and it might be very hot in a mid day in summer.   Today was not too bad.  It is hot when I climbed up, but once I stopped, there was nice wind and very nice day for hiking.

Nice view in the middle section on Peak Meadow Trail

Once getting into the middle section of the trail, we can see a whole Silicon Vally and San Francisco Bay.   The mid section is steep.   Most of trails in this area is on a small hills and there might not be that steep in the other trail.  Mission Peak and Mt. Diablo could be one of hardest one near Silicon Valley area.


Summit on the left
Once pass the middle section, the trail is getting flat and it will be a single track.   In this season, there are many wild flowers and this could be one of nice hiking trail in spring.
We can see a whole bay near the summit

From the main ridge, we can see a whole Silicon valley and San Francisco Bay.  It is really nice view and that is the reason this trail is very very popular and crowed.

Summit, so many people


At the summit, so many people took a rest and took photos.   It was really noisy and almost no space to take a rest today.   So I just pass through the summit.

On the way back, I took hidden Valley trail.  There are some choices from the top.   Most of people take one on the east side, this trail is wide and easy to walk.   I usually take one on the west side.  The west side is steep and the trail is just a single track.  But it could be a bit shorter and not many people. 

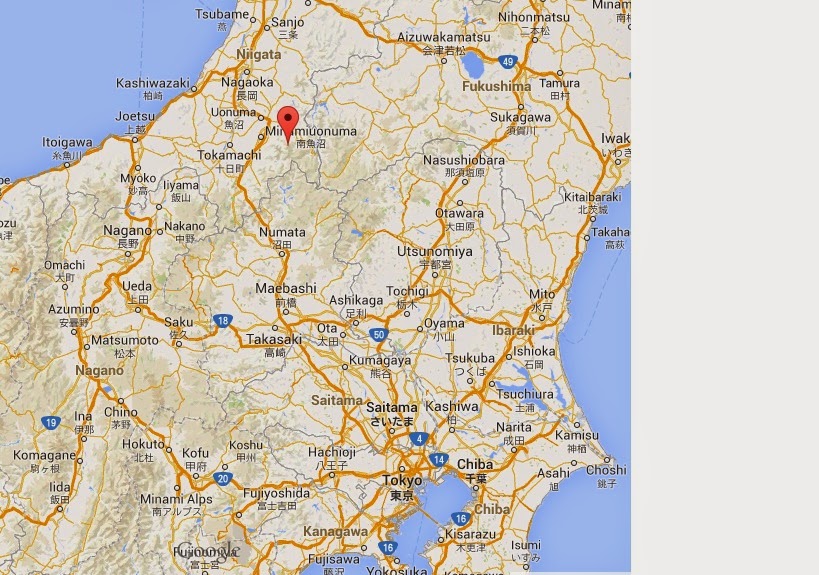
Here is where I walked today
(Total 6miles + or 10km, about 2 hours)


4/30/2014

Garmin Training Plan ~Update

Germin Training Plan

I have planter fasciitis since late last year.  It is getting better and I plan to resume daily training.  So that I visited Garmin Training Plan page again.

One of mistake for recovery from stress fracture on my left leg was I picked full marathon plan.  Even it was "level 1", it was probably too much right after injury.  This time, I was considering to pick 10km or half marathon plan.

However, the page has some new plan in "other" category.  In the category, there are some plans "Getting started".   I just looked into the contents and it might be a good one for the recovery or beginner who just started running.

For recovery / beginner

I would think that people who is on the way to recovery or beginner may start with 3 times a week.  Also it better to increase the training time or total distance slowly.  For the point of view, it could be better to pick 5km / 10km or getting started.

In early stage menu is starting walking, it is good to slowly start. 

The other thing people might want to check is contents in the last a few weeks.  That indicates the goal of the plan, therefore it is good to check them.  Just contents of the time / distance and etc.

I realized this is very important to avoid injury due to over trained.   Having just a day for resting help to recovery the body.


I think overall the Garmin plan is getting improved.  Only thing they did not describe clearly who would the target people.   Other than that, the coverage for the most of regular runners  is good.

I may start a "level 1" 10km or half marathon plan to catch up!


4/26/2014

Alviso Marina County Park


Alviso Marina County Park

Alviso is the south end of San Francisco Bay.  There is a small village and a few restaurants in this area.   At the end of the road, there is a small park called Alviso Marina Country Park.
In a map, it seems to be a part of the bay, however, if we go there, it looks like a trail around a lake.

From the parking lot, there is a trail loop and I went there for jogging this morning when my kids were in Japanese school in San Jose.


Jogging on a trail

Due to some rain yesterday, the trail was muddy again.   It was not easy to run in the condition.  Within a several steps, a lot of mud stick to soles and it was getting heavy in the first 20 to 30 minutes.   There is some cloud, but overall it was nice weather.
Along the trail, there are yellow flowers, they look like rape blossoms, but it might be different one.  A little wind was good for jogging, it was not too hot, not to cold.  

 Flowers on the both sides of trail

For me, it was the first time to jog this trail and I am not sure if I could do loop.   So I just watched time and distance on my GPS watch.  If I took two hours or 6~7 miles, I planed to turn around.  However, it was all right and I could do loop.   Most of people turned around around 2 ~3 miles, only one group was doing loop.

 Rail road -- Straight!
The second half was along a rail road and it was a really long straight section.   In this section, there was some white bubble, I did not know the word in English, based on a dictionary, it seems that it would be named whitecap in English.   It was on the trail and it looked like snow on the trail.....

 Beautiful sky!


 It was like snow!


The distance of the loop is about 9 miles and I slowly jogged there and I took 2 hours.  

After jogging, I went to Maria Elena's Mexican Restaurant for lunch.   It was not so crowded like weekdays and I had a nice time in Alviso.

Map I jogged today

4/25/2014

Introducing mountains in Japan (7) Mt. Aizu-Koma (Aizukomagatake)

At the top of Mt. Aizu-Koma

Mt. Aizu-Koma (Koma-ga-take)

Mt. Aizu-Koma is in "Fukushima-ken".   Now "FUKUSHIMA" is very famous for the nuclear power plant accident in 2011.    The plan is located on the Pacific Ocean side and the mount is located on the mountain side.


The area is about 250km from Tokyo.   It is hard to access using train and most of people drive a car to get there.  The most popular trail head for this mountain is called "Hinoemata" where is also another trail head to Mt. Hiuchi (Hiuchi-ga-take) in Oze (Previous post for this area) from the north side.  This is also a good trail.

The region is also an area getting a lot of snow in winter in Japan.  Since I really like back-country skiing and I only visited there for skiing.   However, hiking in the other seasons is also very nice to see many wild flowers along the trail as well as very beautiful changing color in autumn.

Hinoemata

Hinoemata is a very small village in FUKUSHIMA.  It is famous for Japanese noodle "SOBA".  Also, there are some public hot springs in this area.   There is a big pool using hot spring as well.   The area used to be very quiet and not many people were visiting there.   However, after some development, the area is getting famous and more people are visiting there.

It is very nice we can take hot springs after hiking and we can eat nice Japanese noodle "SOBA".

Season to visit

 In winter time, it might be hard to be there due to so much snow over there.  As I mentioned that people usually need to drive a car to get there, therefore, it is not easy to drive a car in winter time.  I guess the best season is spring to autumn.   In early spring, there is still much snow to enjoy back country skiing.  Without ski, I guess it might be hard to climbing up there.

Late in spring to autumn, different wild flowers along the trails and driving there is much easier than winter.  People can enjoy many things in this area.

It is not easy to get a rent car for foreign people to drive there.   However, it is worth to visit if you really like quiet and beautiful nature over there.  You may take a train and take a taxi to be there.  It would be a long drive from a train station.  In this case, people may take Tohoku-Shinkansen to Nasu Shiobara station, then taking a taxi to Hinoemata.  It will take a several hours from Tokyo.


4/23/2014

Pear

Baby pears in the back yard!

Pear

I have some spare time before going to a school to drop my kids.  I found many baby pears on a tree when I was watering in the back yard.

I thought a season for pears is around summer to autumn.  So that I did not realize baby pears on a tree in spring.   I just remember that the flowers were blooming a month ago, that is almost the same time as cherry blossoms.

 Flowers of pear (shot on March 18th)

Pear flowers is not really gorgeous like cherry blossoms.  But it is really pretty white flowers.   Since blooming flowers a months ago, as a result it comes into bearing now and they will be glowing during spring and summer time.  It is not to easy to realize this fact...

A photo of a day

Since last year, I try to take a photo once a day, a photo of a day.  The photo would be something I found in my daily life.  It is not easy task for me.   I am looking into my daily life to find something interesting.

A typical day, I drop my kids at their school in the morning before going to work.  Then I usually work in the office all mode all day.   At the end of the day, I just go back home.  It is really routine and usually nothing new.   Some time like today, if I do something different from a typical days, then I might be able to find something different from my daily life.  I hope I can find something everyday.

It makes me happy, I feel it is something a new world.

This task is not easy, but I will try to look into my daily life from different angle to find out something new and / or something different.

Anyway, it was really nice day today.  I felt so happy since I found baby pears in my yard.   Maybe I will check them everyday, how they glow up!

I am looking forward to finding something different tomorrow!

4/22/2014

Big Sur International Marathon 2014

Big Sur International Marathon 

Big Sur International Marathon is one of most popular marathon race in California.  For this year's race registration, it was sold out within a few hours on the first day of the registration.
The course is a beautiful along a coast line on CA-1.

Last year, I ran the race without enough  training due to an injury, stress fracture, on my left leg.  I wanted to run it with a good condition.  So that I register the race this year again.

Planter faciitis

Since I finished a full marathon last year, the stress fracture on my left leg was healed.  I supposed to resume a regular training and I would be a good condition this year.
Unfortunately, I got planter faciitis late last year.  This is for the first time for me and I had never had it before.   The training was not getting really hard like before I got stress fracture.   Due to a recovery phase, I did not push me very hard.   But some reason, the pain was getting worse and I saw a few doctors.

However, I have not recovered from it yet.   It is getting better last a few months, but I feel a little pain at the first step when I get out from a bed in the morning.   I stopped running since late last year and I only did elliptical in a gym.   Last a few weeks, I tried to run around 10 miles, however, the pain was getting a bit worse.

So I decided not to run this year's race........

Today, I call a hotel to cancel the reservation this weekend.

No good treatment.....

Planter faciitis is not easy to get healed.   Even if I stopped running for a few months, the pain in the morning has never been going away.  Only improvement is a day time, after a several week of rest, I did not feel any pain in a day time.

Per doctor's suggestion, I stopped running, did stretching every day including night splint, put a special sole to support arch and etc.
They might help to release from pain, however, once I resume running, the pain is always coming back.....

Hope I can run the race next year

I really want to run Big Sur with a good condition.  I probably try it next year again.   Now I am focused on recovery from the injury. 
I hope it is getting better and I can find a solution continue to do regular base training.


4/16/2014

Luna Eclipse

About 1 hour after total eclipse

Series of Lunar eclipse / Solar eclipse this year and next year

Yesterday, April 15, 2014, there was a Lunar eclipse in North America.  According to the news, there will be a series of Lunar / Solar eclipse events this year and next year.  Yesterday's event is the first one.

Here in northern California or San Francisco bay area, the eclipse started around 10pm last night and it was end around 4am in the next day.   After midnight, it was total eclipse and the moon was getting into red, it is called "blood moon".

Unfortunately, the sky was not very clear last night and some time cloud covered the moon.   Since the progress was slow, I was doing something else other than observing the event.   When I got out the back yard, it was around 1am and the moon was almost total eclipse.   I tried to take some photo of the total eclipse.  However, due to some cloud covered the moon, my photo was not very good.

 It is not very clear, but this is the total eclipse
The moon was red!

I gave up to take photos.  But before going to bed, I checked out side and sky was getting clear, the moon was like a half moon.  I took some photos that is shown on top of this post.

This year, there will be another Lunar Eclipse on October 8 and there will be another two events in April and September.  There will be also two Solar Eclipse, but they won't be seen in North America this year.  There is more detail information on NASA web site.

There will be some events next year, 2015 as well.  

A series of such event is not typical, it is good for kids to see the events.  I guess it would be much better to see on a book. 

Next one will be coming October!   Let's mark this date on a calender and see the whole event!

4/12/2014

Introducing mountains in Japan (6) - Mt.Echigo-Koma (Echigo-Komagatake)


Mt. Echigo-Koma (Echigo-Komagatake) in March

Mt. Echigo-Koma (Echigo-Komagatake)

Mt. Echigo-Koma is located in Nigata-ken about 2~3 hours from Tokyo by super-express-train (Shinkansen).   It is about 230km from Tokyo.  Urasa Station is the closest station the express train stops.  However, the public transportation is not very convenient in this region.  You may need to take a taxi to get there.


As you probably know, I like back country skiing, therefore the top picture was taken in early spring in March.  This mountain is really nice back country skiing area.    It is quiet and not many people go there for skiing due to very long approach in early season in March.   Due to so much snow in this area in winter, the major road is closed during winter, so that it is not easy to approach this mountain in winter.  Depending on the progress of snow removal, a major road called "Okutadami Silver line" may open some time in March ~ April.  Then, people can access to Ginzan daira by car.  Starting from this time of a year, some people start visiting for skiing.

Approach in early spring, March~April

In early spring, the approach is still long, but it is much better than winter time.  People may reach to the top by ski from Ginzandaira around 4~6 hours depending on the snow condition.   The going down is easy and fast by ski.   Around Michiyuki-yama is tree line.  Above the mountain, the sloop is really wide open and it is very good for skiing.

For me, early spring is the best season to visit this mountain.   However, this mountain is good to try in summer and fall.   Then, people can approach from north side of Ograyama (Mt. Ogra).  There is a hot spring on the north side named "Komano-yu".   A lodge would open in late spring and many people approach to this mountain in late spring to fall.

There is a lodge near the top of the mountain and people can stay over night in the lodge.  In busy season, a person is in the lodge to maintain the lodge.  People can stay there, but people need to bring own food and cook by themselves.  It helps people to spend more time on their way with many wild flowers and nice view.  The trail is a long and  a day trip could be hard for many hikers, so that the load near the summit is helping a lot!

Echigo 3 zan (Major 3 mountains in this area)

In this area, Japanese people called "3 major mountains in Echigo, Echigo is an old region name for this area", which are Echigo-Koma-Nakano-dake and Hakai-san.  Walking though those 3 mountains are nice.  However a ridge between Nakano-dake and Hakai-san is really narrow.  So that if people wants to walk through this mountain, going to Mt. Tango could be easy choice.   There is another lodge near the peak of Mt. Tango.  This course is also long, but it could be easier than going to Hakai san.

After hiking!

There are some hot-springs in this area.  People can enjoy hot-spring (Onsen in Japanese) before / after hiking.  This is one of really good things to visit this area.  Also, you can find many nice Japanese Sake in this area.  This area is really famous to making very good Japanes Sake in this area in Japan.  One brand name after one of major mountain in this area, Hakkai-san (八海山) is very famous in Japan.  You may find it in a local liquor shop!

Local food in this area could be a fish from river / lake like rainbow trout, wild vegetable dishes from the local mountain.   In fall,  I guess some mushroom dish could be a good one to try.

The area is a bit far from Tokyo, but you can see old Japanese culture over there.  If you need more information, I can help to find them out!!  Please let me know!